AAU Scientific Report Template (LaTeX)
Posted: January 31, 2026
Last edited: January 31, 2026
Table of Contents
- Table of Contents
- Introduction
- Part I - Overleaf
- Part II - Project Structure
- Part III - Project & User Configuration
- Part IV - Using the Template
- Part V - FAQs
- A Small Reminder
Introduction
If you are visiting this page to look for solutions to any errors you are encountering, check out the FAQs on this post!
This blog post is an introduction and guide for my LaTeX template for scientific reports at AAU. I highly recommend this template over the original one provided by the original author as this is simply a cleaned up version of that which compiles fast with zero logs, warnings or errors. This template aims for fast performance, full control, continuous maintanance and aesthetically pleasing front page options.
Unlike the fork of Mads Mogensen’s template this template includes a fancy title page which is a little counter-intuitive in its code, but offer a pleasing title page to the report. If you do not care for aesthetics and want the cleanest and most barebones experience I recommended the template Mads made, otherwise my template can easily be modified to match the simplicity of Mads’ template. This post will not cover how to do that.
Instead we are going to start with how to import my template to Overleaf, the basic setup, configuration and basic usage. This guide will not cover the use of this template for locally compiled LaTeX.
Furthermore: I recommend revisiting this page later as I will update this post over time to add more useful tips and tricks!
Part I - Overleaf
This section covers the overleaf setup which includes:
- Acquiring the template and uploading to Overleaf
- Renaming the project
- Making it compiled
From Github to Overleaf
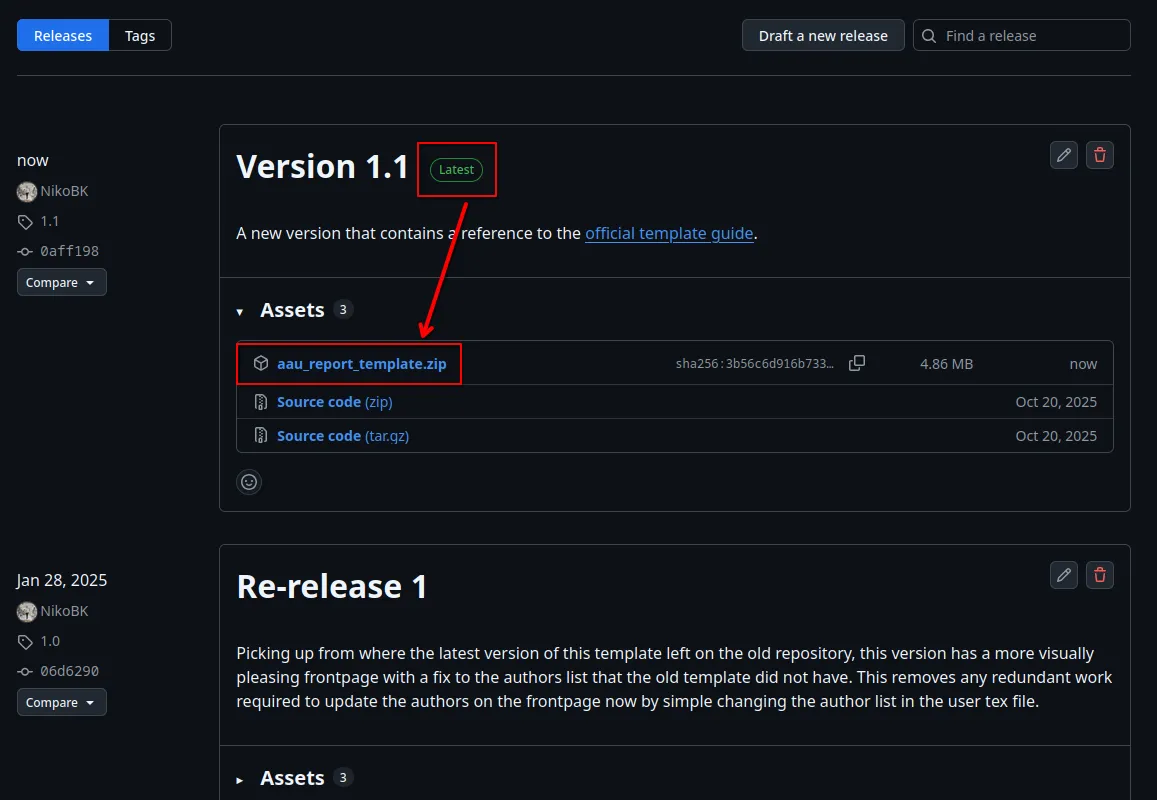
To start, go to the official repository’s release page. Download the latest release:
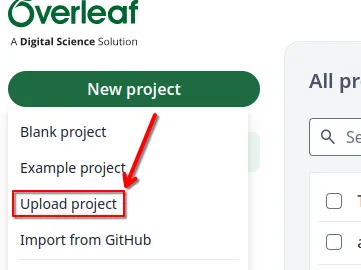
when you are on Overleaf click the green ‘New Project’ button and pick the ‘Upload Project’ option:
Select a zip file and pick the one you downloaded from my template’s release page on github. It should throw you into the project and you will most likely encounter an error which we will fix very soon.
Renaming Your Project
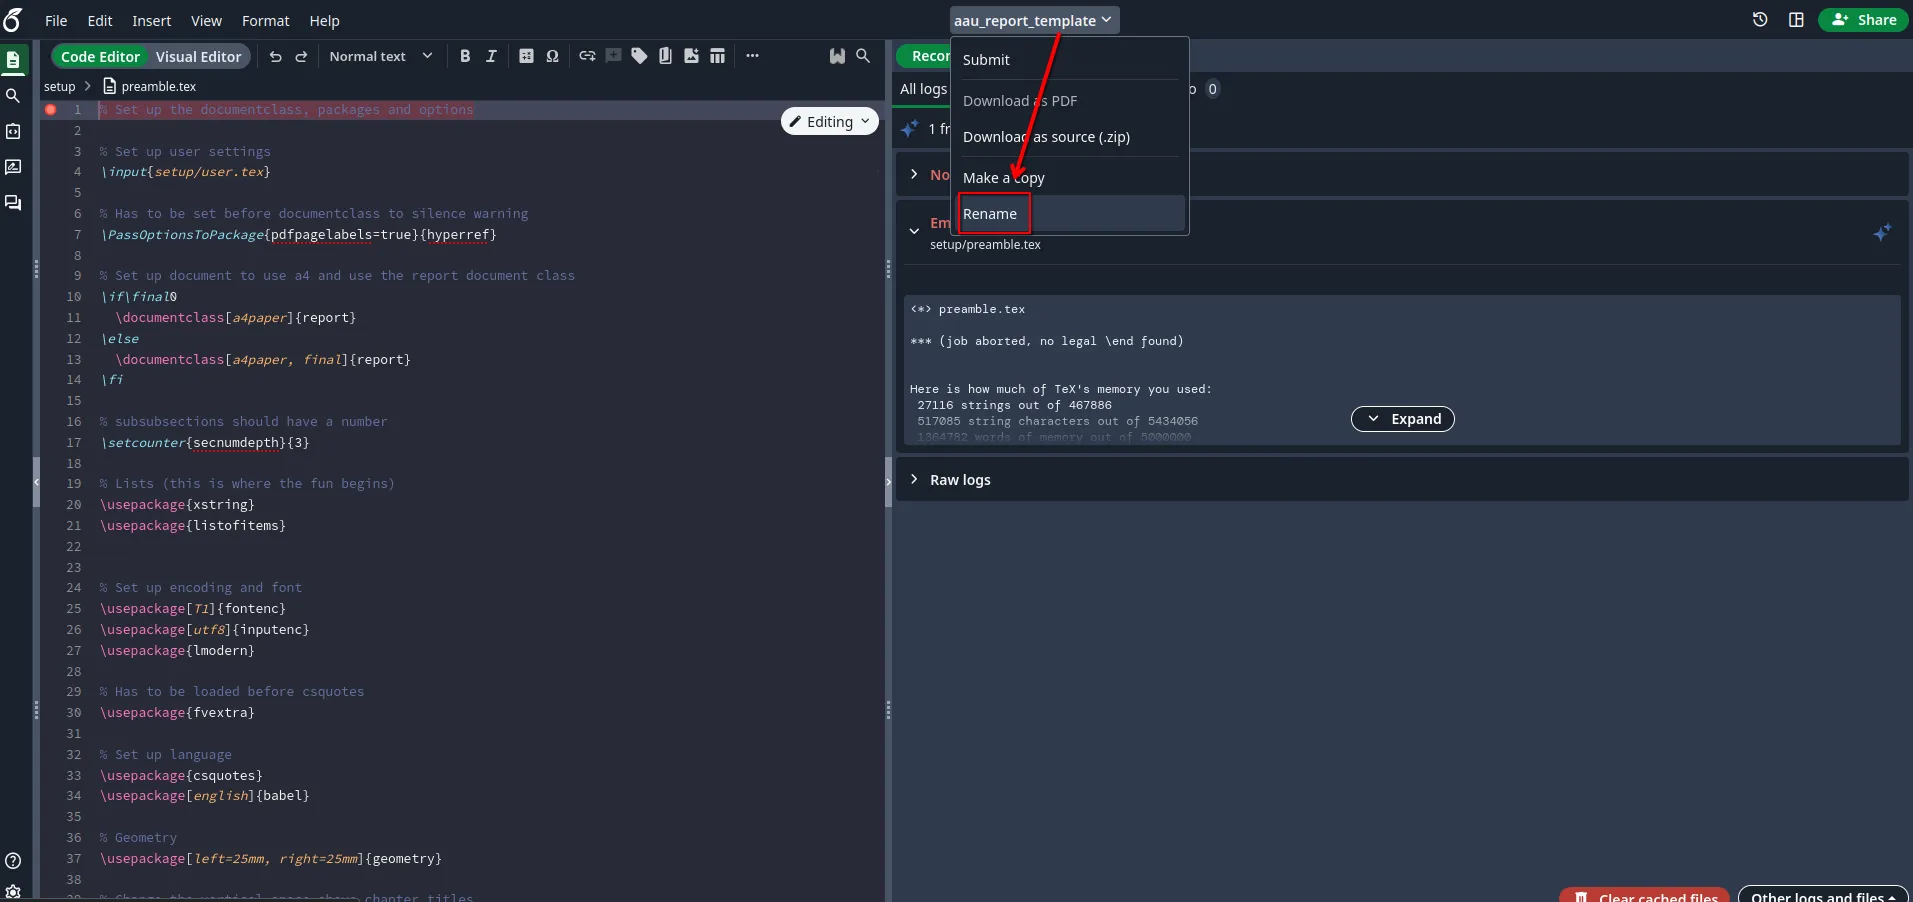
To rename your project click the name in the top of the page and select ‘Rename’. I will just name mine ‘Project Report’ for the sake of this post:
Everytime you upload this project it will be named after the file you upload so this will avoid ambiguous project names in your Overleaf landing page.
Make the Template Compile
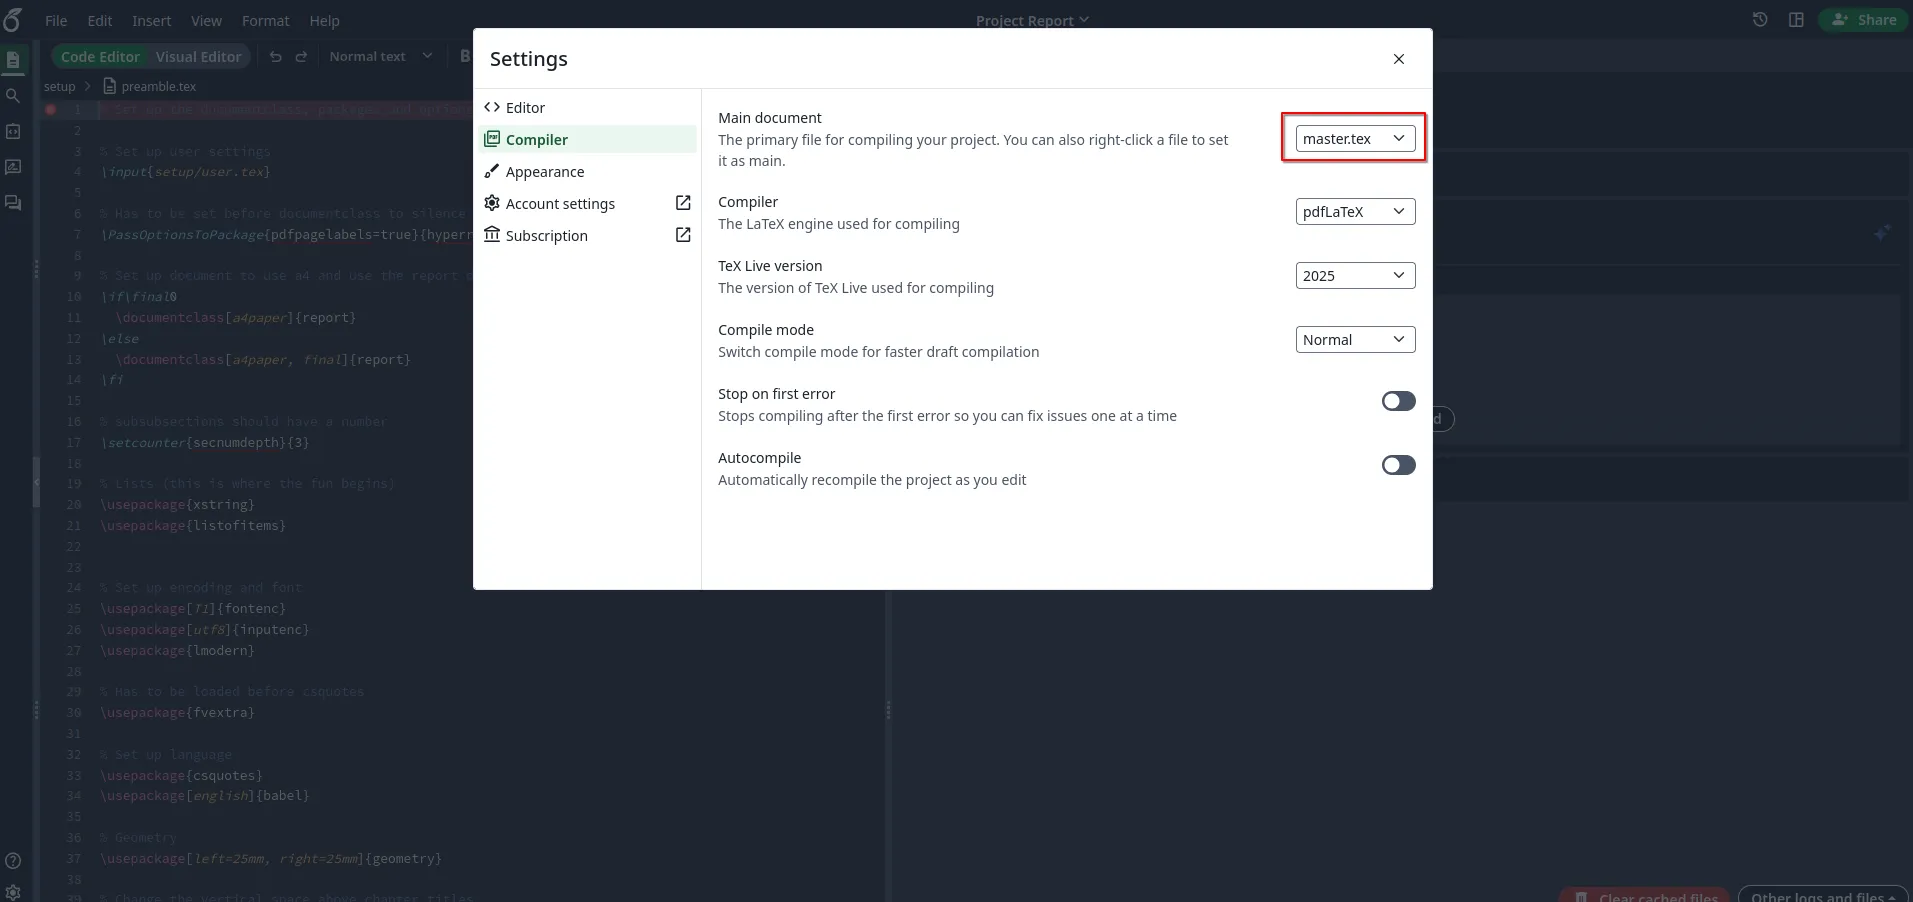
The reason the project is currently not compiling is that Overleaf tries to assign a ‘Main document’ on its own. The main document is described as: “The primary file for compiling your project. You can also right-click a file to set it as main.”. As the description says you can right click any document to make it the main document, we want master.tex to be the main document. Either right click it and set it as the main document, or click the settings cog-wheel in the bottom left, go to ‘Compiler’ and change it from what is most likely setup/preamble.tex to master.tex. It should look like this when you are done:
Now before we move on there is an important rule to understand regarding this template. The project will be unable to compile while you have the setup/preamble.tex file open in Overleaf. This is because Overleaf tries to treat the open document as a root file or a derivative of the root file which breaks because the preamble does not contain an important line of TeX that goes: \documentclass{...}. For now, you just need to know this rule and it might help to know that the preamble is where we import packages we need for “extra features”, but we will go into that in a later section of this post.
Part II - Project Structure
This section covers the basics about file meaning, intention and the structure of the project so that you can maintain the intended way for this template to be used. This intended structure ensures that your project is clean and easy to navigate. The project can be covered in 5 overall parts:
- The root directory and its contents
- The appendix directory
- Figures directory
- Sections directory
- Setup directory
Root Directory
The root directory contains some things needed for the github repository. LICENSE and README.md are not crucial to the success of your project once you are in Overleaf, it comes from Github so you can delete this if you want, although the README file might contain useful information in case you need it. Other than that there are two important files:
master.tex: As you already know this is our main document, it is the very root file of the entire project. This is where you add new sections to the report (more about that later) and define the order of which these sections come (also more about this later). Think of it as the binder in a book that keeps all pages in a specific order.bibliography.bib: Also a super important file, that you must have for any academic report - it contains all your sources that you cite throughout your project and its existence allows generation of a source list in the very bottom of your report. The bibliography / citations page that is generated from it, does not count as a counted page in the page count of the template (also more about the bibliography later).
Appendix Directory
A dedicated directory to appendicies. Very simple.
Figures Directory
This is a dedicated directory where you keep content for figures within the report. This means images of any type (png, jpeg, jpg, etc.). It is my recommendation that you make folders within the figures directory so that all images used for, i.e. the Problem Analysis follow a structure convention of: figures > problemanalysis > image.jpg, but this is mostly up to you.
Sections Directory
A section is as its name implies a part (or simply section) of the report. The intended use for sections in this case is for larger chapters or text heavy parts of the report to have their own file. Sometimes you’ll see people writnig an entire report in one big file which gets messy and hard to navigate really fast. For this reason it is my recommendation that you split things up into individual files. This is already demonstrated with some precreated section documents in the template, go check out sections/analysis.tex - this is a placeholder document for the Problem Analysis. Once you are familiar with these documents go look in master.tex and you will realize how these documents are brought into the report from the main document.
Another important thing to mention is the formality folder inside of sections. Do not touch, move or otherwise do anything to this folder. It is the essential files and resources needed to create things like the title page, preface, bibliography and such which you do need for your report.
When you delete or add a new section document to the project, remember to either add or remove it to/from the main document (more about this soon).
Setup Directory
This is an important directory where we set up things like:
- Document style (margin, text size, font, etc.)
- User configuration (who we are, who this is for, what it is for, etc.)
- Packages (tools used to structure or create special figures, etc.)
We will go more in depth with the specific files in the next part of this post.
Part III - Project & User Configuration
This section covers the configuration for both the users (authors, collaborators, etc.) and the project (information, frontpage, date, pages, etc.):
- Listing all authors (including mails)
- Listing supervisors
- Project title, subtitle, subject, period and field of study
- Due date and pages (automatic)
Listing Authors, Supervisors, Group & Mails
Navigate to setup/user.tex - this is where we do our user configuration.
For authors & emails:
Pretty much as soon as you open user.tex you will see \newcommand{\authors}{% on line 17. For the sake of demonstration I am going to assume 4 group members: Bob, Arnie, Marie and Cheryl. In such case the full code for authors would look like this:
% Authors
\newcommand{\authors}{%
  Bob,%
  Arnie,%
  Marie,%
  Cheryl
}
Right after this code, on line 29 (after writing 4 names) you will see \newcommand{\emails}{%. important: This list of mails are coupled with the authors in the same order, which means Bob’s mail should be the first email in this list and Marie’s mail should be the third mail in the list:
% Author emails
\newcommand{\emails}{%
  bob@student.aau.dk,%
  arnie@student.aau.dk,%
  marie@student.aau.dk,%
  cheryl@student.aau.dk%
}
Tip: Make sure there are no trailing commas in these lists (to keep the compiler at 0 errors and warnings)
Supervisors
Further down on line 41 (4 names and 4 emails) you should see: \newcommand{\supervisors}{%. You might notice this has 2 supervisors. You can add as many supervisors to this as you want, however the most typical case for AAU students is that there is 1 supervisor (atleast for robotics) so if that is the case, remove Supervisor 2 and the trailing comma after Supervisor 1 and change the supervisor’s name. I will use Paul for my supervisor.
% Your group's supervisor(s).
\newcommand{\supervisors}{%
  Paul%
}
Because I am using only 1 supervisor we need to make a quick change to something called a ‘macro’. Go to setup/macro.tex, on line 34 you should see {Supervisor(s)}% . If you have more than 1 supervisor listed change this from {Supervisor(s)}% to {Supervisors}% and if you have one supervisor go with {Supervisor}%. Right above it change ‘Participant(s)’ to ‘Participants’ as well.
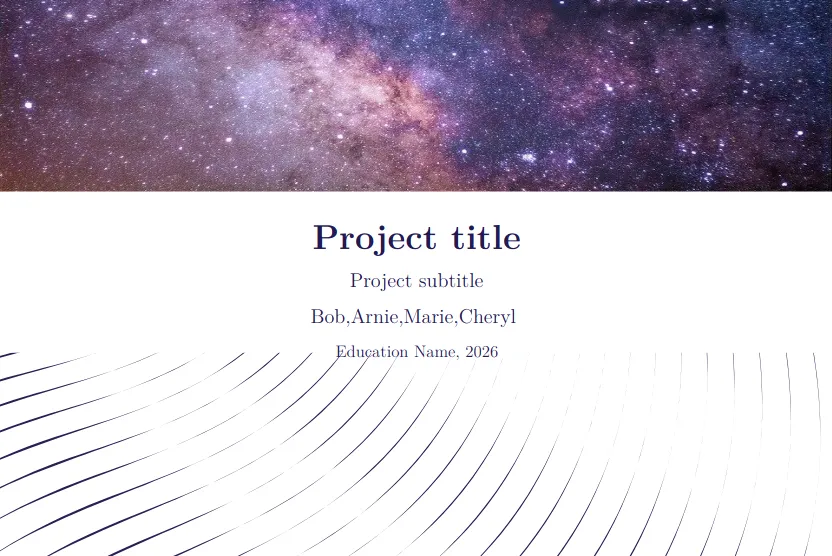
That is it! Now when you recompile you should see author names on the title page:
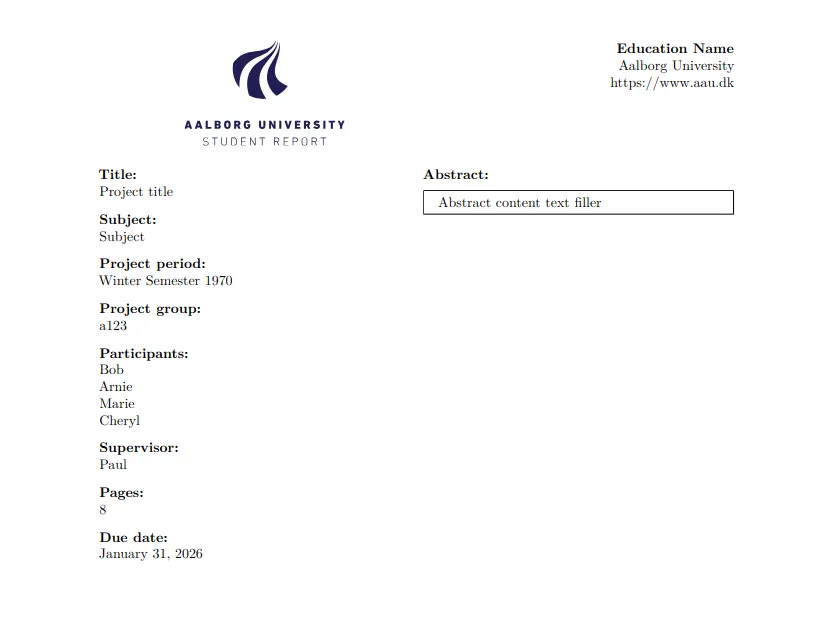
As well as both authors and supervisor(s) on the front page:
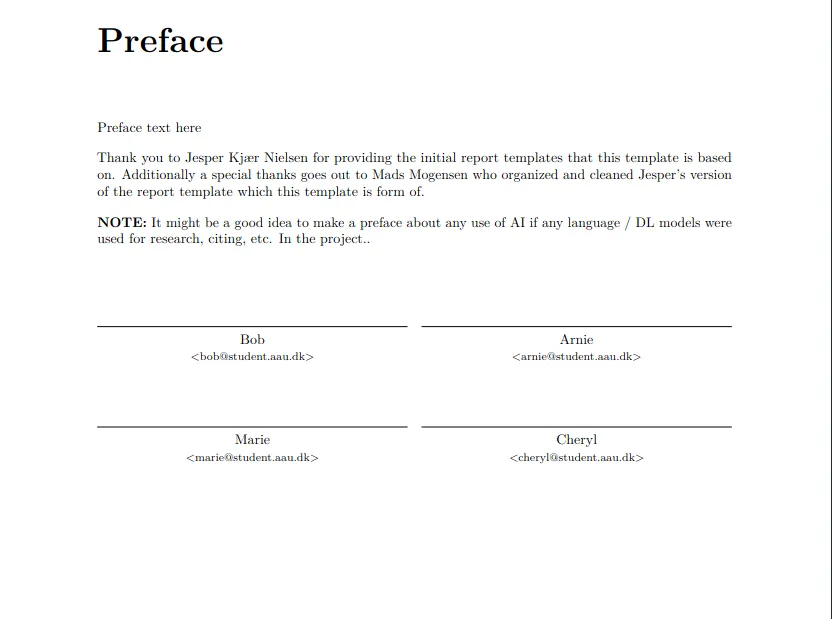
And names + emails on the preface:
Whatever group number you have been assigned by your university can be changed in user.tex on line 56, at \newcommand{\projectgroup}{a123}.
Setting the Title, Subtitle, Subject, Period & Field of Study
Within user.tex you can find the following fields to be changed:
% Title
\newcommand{\maintitle}{Project title}


% Subtitle
\newcommand{\subtitle}{Project subtitle}


% Subject
\newcommand{\subject}{Subject}


% Project period
\newcommand{\projectperiod}{Winter Semester 1970}


% Project group


% Due date
\newcommand{\duedate}{\today}


% Name of education
\newcommand{\eduname}{Education Name}
Change all of these in accordance with your report properties. You don’t have to change duedate, the assumption with this is that you will recompile and use the latest generated pdf on the day that you submit so that the date is the day of whenever you are compiling it. I recommend keeping this.
Part IV - Using the Template
Now that we are setup and ready to start working on our project, this part of the post will cover how to modify the project and use the template. This includes:
- Choosing title page variations
- Using the template for a master’s project
- Writing the abstract and preface
- Adding citations and sources to and for the bibliography
- Creating, deleting, adding and removing sections
- Adding images and creating figures
- Making references to chapters, figures and more
- Adding packages
Choosing Title Variations
In user.tex there is an option to change the colors between inverted or not for the title page.
% This toggles the colors on the frontpage.
% 0 = White background, blue frontpage text.
% 1 = Blue background, white frontpage text.
\def\flipcolors{0}
One makes the text white (on the title page only) and the background “AAU blue”, while zero makes the background white and text “AAU blue”.
Using the Template for a Master’s
If you are writing your master’s project, set masterproject inside of user.tex to 1 on line 10.
Writing the Abstract & Preface
To start writing the abstract you can find a unique file for it in sections/formality/abstract.tex, it is important to mention that you do not have to define a chapter or anything in here. Just start writing. The box in which the abstract fits within regulates its own size to fit your text, however it is adviced to not write so much that the box exceeds page bounds (sort of goes without saying for an abstract).
For the preface, it is also located as its own unique document in sections/formality/preface.tex. It does have a chapter. Notice the * operator in \chapter*{Preface}\label{ch:preface} - this ensures that the preface is not counted as a chapter with an indexed numerical representation and is omitted from the table of contents. Keep this and change the text to fit your project.
Adding Citations & Sources
Sources are added to the bibliography.bib file. The easiest way to get the BibTeX for a source is to use a BibTeX from URL generator like GetBibTeX which will take a URL for you and create the code you can just copy and paste into the bibliography for you.
Some very important things on this point:
- If you write broken BibTeX into the biblioraphy it will cause the Overleaf compiler to error and prevent anyone working from generating a new PDF so be mindful of the generated BibTeX and/or how you write it in.
- Keep the bibliography file clean so that it is easy to navigate and edit for others collaborating on your project.
- Always check the compiler logs and warnings after adding a source in case you edit the source type (what comes after
@, i.e.@article,@misc- this can break the bibliography and report too!)
When citing a source that has been added to your bibliography you can simply use \cite{sourcename} after any text where sourcename is the name of the bibTeX you added to your bibliography. Example:
Bibliography:
@BOOKLET{Madsen2010,
  author = {Lars Madsen},
  title = {Introduktion til {LaTeX}},
  year = {2010},
  howpublished = {\url{http://www.imf.au.dk/system/latex/bog/}}
}
Anywhere in the report:
This is a citation to Madsen2010.\cite{Madsen2010}
Creating & Deleting Sections
To create a new section for your report click the three dots or right click the sections folder, then create a new file:
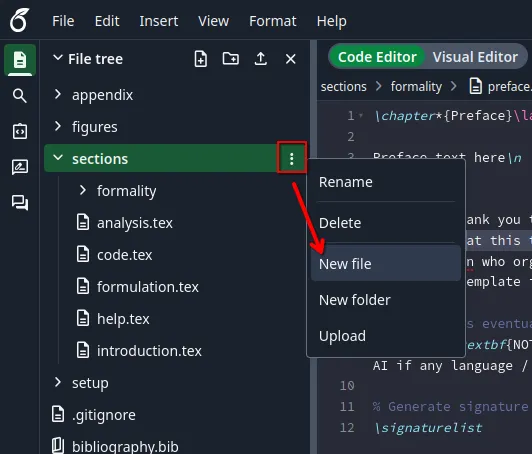
It will open a window with a prompt for a file name, I am just going to call it newsection.tex. This will create the empty document, paste in the following TeX:
\chapter{New Chapter}\label{ch:newchapter}

This is a new chapter.
This starts the section of by assigning it a chapter and a label. You can change the New Chapter to whatever you want, but I recommend keeping ch: in the label name as it indicates that the label belongs to a chapter. This will make it easy for you and others to know that you are referencing the right thing.
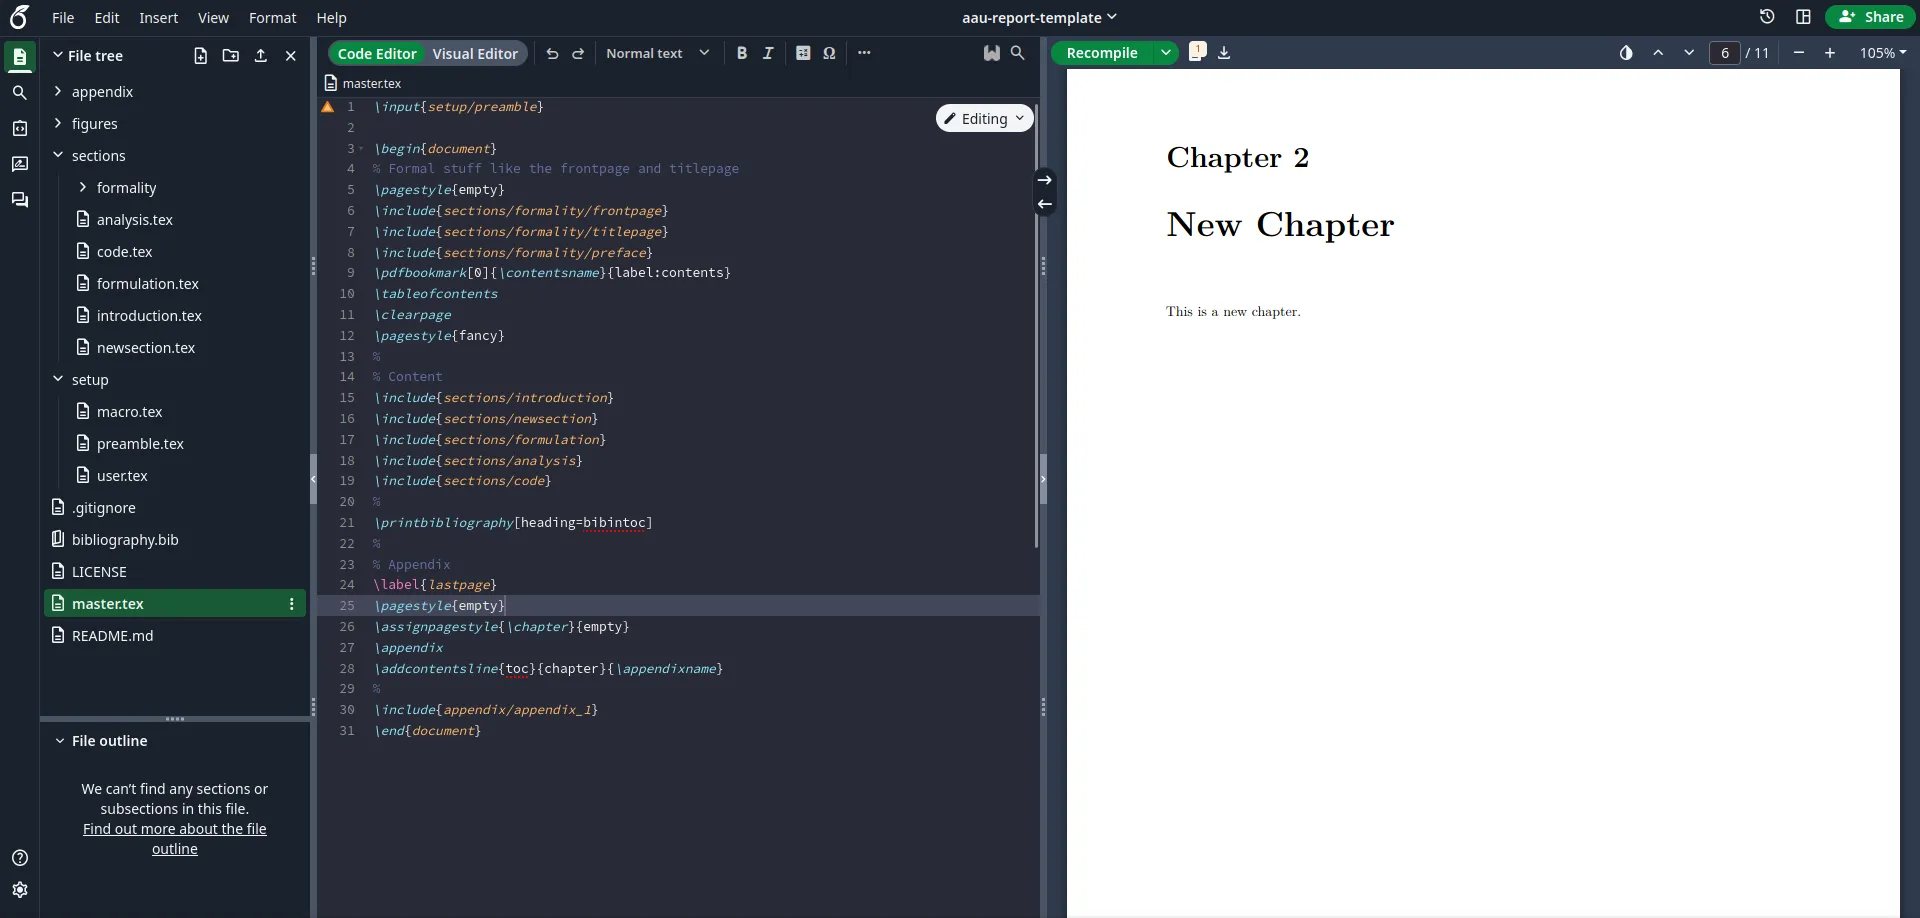
Now to actually make the section show up in the report, go to master.tex and add: \include{sections/newsection} after where you see the main document include any other section (under “% Content”). I am going to include it right after the introduction, it will look like this:
% Help
\include{sections/help}
% Content
\include{sections/introduction}
\include{sections/newsection} % This is new
\include{sections/formulation}
\include{sections/analysis}
\include{sections/code}
Now compile the report and you should see this after the introduction chapter’s page:
Deleting Sections
To delete a section simply remove or comment out the inclusion of it in the main document, like this:
% Help
% \include{sections/help}
% Content
\include{sections/introduction}
% \include{sections/newsection}
\include{sections/formulation}
\include{sections/analysis}
\include{sections/code}
The above effectively removes the new section we just made and the help section that is part of the template without permanently deleting the TeX files. I recommend always doing this and then moving the unused TeX files to an archive folder or leave them be until the date you submit to avoid losing work that could be valuable in the future.
Always make sure deleted TeX files are not being included in the main document.
Adding Images & Creating Figures
As with sections, I generally recommend making folders for images used for figures in specific sections. For all images used in figures for the problem analysis specifically I recommend making a figures/problemanalysis folder. Try to compress images as much as possible using tools like ImageMagick! Overleaf takes longer to compile and generate the PDF if images are large in size and has high resolution which is often very redundant when its directly from a phone or similar since it has to be scaled down to fit the report.
Referencing Chapters & Figures
I highly recommend always using autoref as it will reference the following TeX:
\chapter{Chapter}\label{ch:test}

... Back in \autoref{ch:test} something happened...
As: “… Back in Chapter 1 something happened…”, this will save you words compared to doing ... Back in Chapter \ref{ch:test} which would display the same result.
Adding Packages
All packages are added to preamble.tex. Add the latest packages to the bottom of the document and make sure you are not adding a package that is already added as that causes warnings, possibly errors and confusion. I recommend documenting what the imported package is used for or the intention behind the import to help readability along. Keep in mind you still can not compile while in preamble.tex, so leave the document once you have added a package and then compile.
Part V - FAQs
Q: My Overleaf wont compile - what am I doing wrong?
A: First read the logs in your compiler and see if there are any acknowledged errors it points towards. In case of a faulty bibliography, the compiler might blame the master.tex file which does not help you, so in that case go through your bibliography and check for errors. Make sure you have set the main document to master.tex (see the first part of this blog-post on how to do that) and make sure you are not inside of preface.tex while you are trying to compile.
Q: I think my bibliography might be faulty, but I can’t tell. What do I do?
A: There are some good online validators that check your bibliography’s bibTeX for errors, one of them could be Online BibTeX Tidy, by Peter West
Q: Some visual elements seem to be misplaced, and seems not to be of my doing. What can I do?
A: This would imply there is a bug, some outdated TeX or broken setup in the template itself, please contact me through my website if this is the case and let me know, then I will fix it as soon as possible.
A Small Reminder
I will update this post over time, so if you have any inquiries about what could be better, corrections or general feedback, I would always love to hear it. Thank you for reading!